Showing posts with label Silver. Show all posts

Wednesday, April 27, 2011

Advance Pics - NEW Barbados Seaglass Necklace!

Advance Pics - NEW
Barbados Seaglass Necklace!

Here are some advance pics of my new Barbados' Seaglass Necklace - can't wait to hear what you think!


Friday, April 22, 2011

How to Cope with Rising Silver Costs - Some Ideas for Jewelry Artists!

How to Cope with Rising Silver Costs?
Some Ideas for Jewelry Artists
- Tara, Treasure Trunk Designs

Let’s face it folks m the cost of silver is not going anywhere but up for a long time to come! 
The rising cost of silver really puts the pinch on jewellery artists – such as me here at Treasure Trunk Designs – who work predominantly with sterling silver and fine silver clay. 


(Check out blog post: Why is the cost of silver going up?)


As a start-up hobby business, cash is minimal and increasing silver costs mean along with a struggling economy means that sales might slump as the costs of finished pieces rise!  What to do what to do? 
During times like this, people need to learn how to be creative and resourceful.  There are many ways to do this so don’t get discouraged! 
Here are a few tips to help get you started and ways in which Treasure Trunk Designs has been expanding in order to continue to provide a selection of beautiful jewelry for the Diva on a Dime!
1.       Copper!  Copper is an absolutely gorgeous metal, easy to work with and low cost.  A beautiful burnt orange colour, copper is perfect for fall and can be a great seasonal addition to your shop.  You can get copper wire in all guages for a fraction of the cost of silver or gold.  Search for true copper materials to reduce potential allergic reactions to nickel.  You can find  99.9% pure copper wire easily and it can be mixed with other metals to add colour and help reduce costs for both you and your clients!

2.       Recycling scraps for cash is a great way to reclaim costs.  Don’t just throw those bits of silver cut-out in the trash!  Melt them down to create beautiful silver accents on your work or sell it for cash or credit with your suppliers.  When filing sterling or fine silver, collect the dust!  You will be amazed how much silver you will get from those tiny particles floating around your work bench!

3.       When shopping online buy in bulk!  By buying large quantities, you may be eligible for price breaks chances are you will probably reduce your shipping charges as well!  For example, if you buy one cabochon you will be paying full shipping rates but if you buy two or more the additional shipping rates will be negligible if not free!  This might seem like a small amount but it adds up significantly over time.  Shop smart! 

4.       Sell supplies that don’t inspire you to create.  If you are anything like me, you have a pile of unused supplies that are sitting in a box begging to be used.  If you have supplies that just sit around and don’t inspire you to create, why not reclaim costs by selling them as “destash” items.  Many hobby artists are unwilling to buy in bulk and will pay full price for smaller quantities of beads and other jewelry supplies. 

5.       Team up!  Get to know other jewelry artists in your community.  By joining together on bulk purchases you can benefit from reduced prices, lower shipping charges while meeting new people and creating a network.  By supporting each other, you can all benefit.

6.       Is there a lapidary club in your area?  Join the rock hounds to learn more about the stones you work with, learn some new skills and maybe even start making your own cabochons.  This is a great way to meet new people, network and potentially save on material costs.  Lapidary clubs sometimes buy silver in bulk.  As a member, you may be eligible for reduced silver prices through your local lapidary club.

7.       Expand your work to include other materials such as fabrics, recycled materials, wood, plastics, hardware, clays other creative materials.  Exploring other mediums can be a fun and exciting way to expand your skills and provide interesting elements to your collections for a fraction of the cost of traditional metal work.
8.       You could use silver plated wire however, in my experience as an allergy sufferer, the plating ALWAYS seems to come off quickly.  This is no fun for delicate skin!  As an alterative, why not try silver filled wire instead? The silver is bonded to a brass core but unlike silver plated wire, the silver coating is much thicker and durable. 

      If you are in the Ottawa area, you can find silver filled wire at Rainbow Minerals.  Rainbow Minerals provides an excellent selection of gemstones, some basic beading equipment and a variety of copper, silver, gold fill and silver fill wire.

Have an idea that you would like to see added to the list?  I would love to hear your thoughts and how you have managed to cope with the challenge of rising silver costs. 

Sunday, April 17, 2011

Why is the cost silver going up?!?


Why is the cost silver going up?!?

The other day I bumped into a fellow jewellery artist in town.  Unlike myself, this artist went to school to study the craft and makes a full-time job of it (wouldn't that be fun!).  As a struggling self-taught hobby artist I was shocked to hear that my colleague had not noticed the increasing cost of silver until I pointed it out during our discussion a few weeks prior.  She made note of it this time around and expressed concern over upcoming supply needs.  I can't help but agree.
Silver is breaking new records with the cost rising daily.  No longer the "poor man's gold", the price of silver has increased in leaps and bounds from around $6 to $40 in only a few short years.  Indeed, even in the past 6 months, the cost of a 45 ounce package of silver clay has more than doubled what it was last year. 
Silver is already at a 31 year high with investment trends calling for a further increase by summer to a whopping $48 USD per ounce before a slight market correction and then continuing price increases. 
While some investment analysts attribute this increase to a long delayed price correction, others claim it is the result of demand versus supply problem. 
Unlike gold, silver has an array of uses and is in much demand by industry, artisans, cutlery producers, it’s even found in batteries, solar cells, mirrors, paint and even some medicines! 
Because much of the silver used for these purposes – such as medicines, paints, etc.. – can not be recovered or recycled, a further pressure is added to supply availability.
While the average price of silver has skyrocketed, it’s estimated that silver mine output will only increase at a rate of about 2.5 %.  As beaurocracy lenthens the time it takes to discover a site, obtain appropriate government permits and establishing a fully operational mine, silver supply is not expected to meet demand for many years to come.  
All scary news for jewelry artisans and aspiring metalsmiths like me! 
Even before learning how to create jewelry, cut metal, solder it and watch the beautiful process of melting pure silver (by accident at first but it soon became a fetish!), I have always been attracted to silver.  Gold was pretty and flashy, copper was interesting but it was always silver that compelled me to ouuu and ahhh and finally with trepidation pull out whatever cash I had in my pockets to buy that gorgeous tricket that I simply could not live with out. 
Neverthless, as silver is being touted as the “investment of the decade”, price jumps will inevitably continue to affect the cost of jewelry at both producer and consumer levels.
Want to learn more?  Check out:

Friday, March 25, 2011

Photographing Jewellery

* Photographing Jewellery *

Photographing jewelry is NOT easy.  It's tiny, sparkly, reflects everything and a little shake of the hand makes your pictures fuzzy as all heck.  My first jewellery photos were a nightmare.  Hours of painstaking effort for blurry pictures with terrible colour that made my best work look like crap.


I took my jewellery outside, on the deck, on the outdoor table, inside, on the desk, on the floor even!  I changed the settings, I used a flash, I took off the flash, I changed the ISO, manual, automatic, shutter speed, you name it!  I even got out my extended snap button so I wouldn't shake the camera when I clicked the pic.  Nothing worked! 


Here are some of my original jewellery pics....


These were some of the "better" pictures from my first attempts.  As you can see, they still suck! 

So, after much cussing I decided that something needed to be done!  No one would ever look twice at my jewellery with pictures like this! 

Having gone back to university for my Master's degree, money was tight.  However, after digging through my change box and hunting around in all of my winter coat pockets (does anybody else do that?) and scrounging around for change that fell into the sofa cushions I managed to put together enough money to buy a light box.  It's not the best-of-the-best by any means.  However, as a start-up business, it was enough to meet my needs by combining efficiency, a decent price and a nice small pack-up size since I work from home and don't have a full studio to store all of my equipment yet!

I chose the Optex Portable Photo Studio & Lighting Kit (OSLKIT) which was selling for about $120 although I recommend you do some shopping around as the price can range by around $30!

This kit is very handy.  It is super easy to use and folds up to a nice convient size.  While the light bulbs are not quite bright enough and you may still need to fiddle around a bit, the Optex kit is invaluable to jewelry artists on a budget.  Combine it with a few simple props, a decent camera and a tripod and you're laughin'.

Here are some of the photos taken post OSLKIT:


Can you see the difference?  I sure can.  It is SO much easier to photograph silver, gold and gemstones now that I have the Optex light box.  I still get frustrated from time-to-time but the improvement to my jewellery pictures is undeniable.

Here are a few other tips to get you started:

- Forget photographing on a black background.  It just doesn't work.  Stick to white, grey or a some solid colour that does not detract from your pieces. 
- Keep it simple.  The focus is your jewelry so try not to clutter the pictures you take with too many decorative items. 
- Try to take detailed pictures of your work so that you can display each piece from different angles.  This way, the client knows exactly what they are getting.
- If you are able to post more than one picture of the piece, it's nice to let your clients know the size of the item. To indicate size, place a coin or a ruler beside your work.  If it's a ring, take a picture of the ring on your hand.  Just hold your hand in the light box and try not to shake! 
- Use a photo editor.  Your digital pics might still need a bit of fiddling with and a photo editor will do the trick and allow you to add a logo.  I don't have a photo editor right now as my computer died and everything needs replacing and updating but it's definitely on my list!

Still feeling the budget pinch?  You can start by making your very own light box.  Check this video out by A & R Pythons - he photographs snakes!  Yes SNAKES!  Yikes!  Anyway, the concept is the same and the snake videos - while they freak me out - are kinda fun!

Have fun!

- Tara, Treasure Trunk Designs

Optex Portable Photo Studio & Lighting Kit – OSLKIT


Sunday, March 20, 2011

Don't play with matches...

Don't play with matches...

So after a long day of mucking up, cussing and melting silver, I have decided that playing with a torch when you are tired and cranky is a very VERY bad idea... Now why doesn't home depot sell fire retardent aprons??? 


That's it for today.  Maybe a cup of tea would be a good idea...


- Tara, Treasure Trunk Designs


Sunday, February 20, 2011

Barbados' Sea Glass Rings!

* Barbados' Sea Glass Rings! *


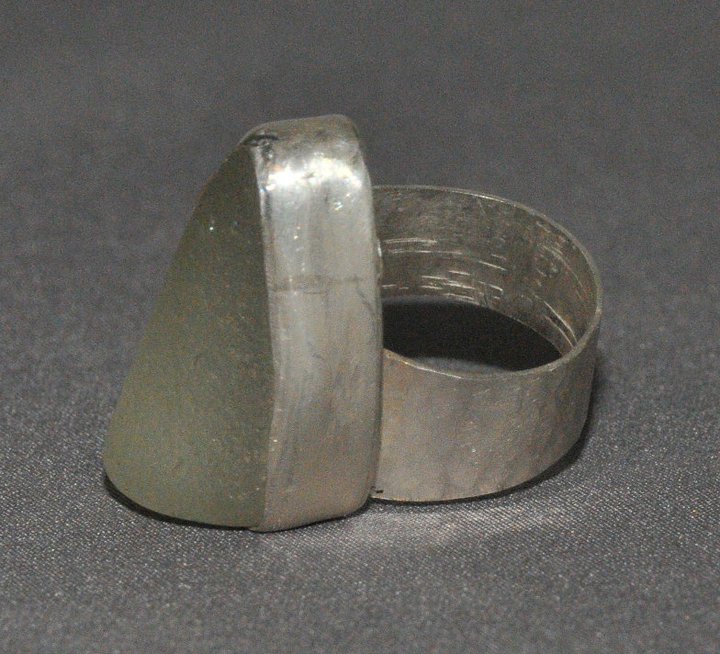
After stocking up on supplies during my shopping spree at Metalliferous in the fabulous New York City, I finally got around to my sea glass from Barbados.


(check out my blog "New York City - A Road Trip!" @ http://treasuretrunkdesigns.blogspot.com/2011/02/new-york-city-road-trip.html )


This project was a lot of fun but it was also soooo frustrating!  My first attempts at creating bezels and rings, and I choose awkward, irregular shapes and heights... What was I thinking?!? 


Dave, from Metalliferous, tried to persuade me to take a step back.  He said, and I quote, "Don't you understand?  It's like you're going into the Amazon!" Ha!  This guy was awesome, helpful and hilarious!


Anyway, so here are my first attempts at making rings.  I hope you like them!


Tara, Treasure Trunk Designs


Below you will find some pieces that I've picked out for future rings. 
What do you think?